Image Processing is one of the emerging areas in the field of Information Technology and people yet exploring the limits of it. It is heavily used in major areas of IT such as Computer Vision, Artificial Intelligence, Computer Security etc. Recently I got an opportunity to work with Image Processing Technologies as a part of one of my projects and my task was to find matching images from an image store when a new image is given. I started my project with googling "How to compare images using java" and I got some good articles on finding the similarity of two images. Allmost all of them were based on four basic steps, they are:

  1. Locating the Region of Interest (Where the Objects appear in the given image),
  2. Re-sizing the ROIs in to a common size,
  3. Substracting ROIs,
  4. and Calculating the Black and White Ratio of the resultant image after subtraction.
Though this sounds as a good algorithm to compare images, it took a considerable amount of time after implementing it using JAI in my project. Therefore I had to find an alternate method of doing it. After searching the Web for few hours, I came across with this amazing article by Rafael Santos on "How do I compare two images to see if they are equal?" in his famous (but not yet completed) book "Java Image Processing Cookbook" which describes a different approach to compare images for similarity using image segmentation and region manipulation. It mainly focuses on finding some regions of a given image that matches with the images in the image store rather than searching for equality of the objects in given images. He describes an algorithm to find similar regions in a set of images and provides some sample code based on image segmentation and region manipulation to compare the equality of two images. After reading the article and playing with the sample code given there, I was able to further extend it to suit my need. So I wrote this note to express my gratitude towards him :-) The algorithm proposed by him (which is also available in his book) is as follows.

  1. Pre-process the image, if needed (e.g. to enhance contrast, filter noise, etc.).
  2. Do an Image Segmentation, process in which the image is converted to regions which contains pixels that are similar to pixels in the same region and different from pixels to other regions. This can be done using region-growing, mathematical morphology, clustering or classification algorithms. There are many algorithms to do that, just google for "image segmentation" and other keywords to get more information.
  3. With the regions, create descriptors for them. Descriptors are calculated from the region and can include shape, area, perimeter, number of holes, general color of the region, texture, orientation, position, etc.
  4. If needed, do a Re-Segmentation of the image, process in which regions are merged if they can be considered as belonging to the same object. Note that this step may require some high-level knowledge of the objects and the task in general, seldom being fully automatic and often being task-dependent.
  5. If needed, filter the regions that seem relevant to the task in hand, eliminating small regions or regions which are deemed unrelated to the task (again this may require some knowledge about the task).
  6. Store the image's regions' descriptor for further processing. Repeat those steps for other images.
  7. Use the descriptors for comparison of the contents of the images, using some of many algorithms for pattern matching, classification, clustering, artificial intelligence and data mining in general.
Bookmark and Share


Since I came to notice that there’s considerable amount of traffic coming to this site seeking for Windows Vista Drivers for ZTE ZXDSL 852 modem, I thought of uploading the Vista driver I have with me for that modem and make it available for download through this site. You can find the Vista Driver for ZTE ZXDSL 852 modem here. I got this driver from Sri Lanka Telecom, who is my Internet Service Provider but they recommend ZTE ZXDSL 852 modem to be best use with Windows XP rather than Windows Vista. But this driver works well for me and I hope it will help you too to sort out your problems with ZTE ZXDSL 852. Drivers for Vista 64 bit and XP 32 bit Operating Systems are also included in the download pack.

Bookmark and Share


Microsoft Corporation has officially announced their next version of Windows, which is going to be Windows 7, in Windows Vista Team Blog, which is the official blog for Windows Vista. The announcement was made by Mike Nash, Corporate Vice President, Windows Product Management, Microsoft Corporation in one of his posts there. According to his post on Vista Team Blog, Microsoft Corporation will share the details of the release Windows 7 on two of their upcoming events at PDC and WinHEC. Further they are planning to share a pre-beta "developer only release" with attendees of both shows. Also he has mentioned that this is the first time Microsoft is using a codename to name a final product. Now you may wonder what's the point of talking all these nonsence in a personal blog. Well, Just to make a single point. If you are willing to take part in one of the above two events of Microsoft, where there are planning to distribute developer only versions of Windows 7 for "free", you may need to think about this also, Whether to assure the quality of Windows 7 (or Simply put, QA Windows 7) for "free" using the "free" version you get and pay "$$$" for the final official release to buy your own copy of Windows 7 or use your time on QA-ing Windows 7 for "free" on something worth investing???. Good Luck with Windows 7!!!

Bookmark and Share


Fed up with keeping Facebook Home page open in your browser all the time just to chat with your Facebook buddeis??? You don't need to do that anymore. Yes, Pidgin community has done it again for you, just for you. Now plug-ins are available to enable Facebook chat on Pidgin, where you can use Facebook chat simply as you use your favorite instant messenger to KIT with your buddies. Here I'm mentioning the plugin I'm using to reach my buddies in Facebook. It's called pidgin-facebookchat. You can easily install it by downloading it into your local hard drive. It is available as a deb for Debian users, as an exe for Windows users and Red Hat users can check the future plans page to check whether the rpm is ready. The installation is really easy. Just double click on the exe or deb you downloaded and add a new account to chat with Facebook buddies by navigating to Accounts > Manage on Pidgin. Click on add tbutton there to add a new account for Facebook chat while selecting Facebook Chat as the protocol. Then you can enter your username (Your e-mail account you use to log in to Facebook) and password to enter facebook. That's all you need. Why wasting your computer resources on browser when you really don't need it? Use Pidgin.

Bookmark and Share


I’m using Facebook for nearly one and half years and I believe you all will agree with me if I say its a great social networking tool for people like us to find our old buddies, who haven’t seen for ages. So now, surfing in Facebook for few hours has become a part of my life style. Yesterday when I was working on one of my projects in early morning, I got a mail message from Facebook saying one of my friends has written something on my Wall. Since I didn’t hear from that friend for some time, I was excited to see what he has written there. Therefore I logged in to Facebook and checked the new wall post I just received. The post said someone has written something interesting about me (funny ;-)) in their blog and my friend has happened to notice that and sent me a Wall post mentioning the blog URL. I was so excited to see what is there inside that blog and I quickly clicked on the blog URL given there, which was http://ceceliacyfehy.blogspot.com/ to see what’s inside. Then a Web page opened up in a new tab, but it was not a blog. Instead a page 100% similar to Facebook login page appeared and asked me to login to Facebook. Since I clicked on the URL received by my friend, I knew that I didn’t make any spelling mistakes when typing the URL on the address bar (Actually I didn’t type anything, I only clicked on the URL I got), which was finally ended up by going to Facebook login page instead of the blog page I wanted to see. Also I knew that I already logged in to Facebook and I don’t need to provide login information again and again since I have correctly logged in to the site once. While thinking what went wrong, I clicked on the URL I got through the Wall post again to view the blog page and it again gave me a page similar to Facebook login page. At this point it came to my mind that this can be an attacker who is trying to hack my Facebook login details by redirecting me to a FAKE Facebook page whenever I clicked on that blog URL, inviting me to login to it by providing my Facebook login information. Therefore I managed to not to give my login details there and I checked the URL appeared on the address bar. Believe me, it was http://faceilbook.com/ very similar to the URL of the official Web site of Facebook which is http://www.facebook.com. Luckily my eyes were vigilant enough to see the difference in the URL appeared on the address bar before I enter my login details, where most people fail. I knew my friend who has sent me this URL with a Wall post has been hacked by someone and I wanted to see what the hacker has done using my friend’s Facebook account. Usually when you go to one of your friends’ page, the recent activities are listed there, so I browsed my friends Facebook account to see what the hacker was doing in the recent past. I was frightened when I saw what he has done using my friends Facebook account. This hacker has sent Wall posts to most of the friends in my friend’s friends list and most of them were again my friends. So I checked some of their profiles to see the Wall posts that they have received by this hacker. All of them have received the same Wall post like me, but with different URLs which redirect you to this very same FAKE Facebook page. I’m listing some of the URLs here, and I’ll tell you, the actual list goes far beyond this. Some of the FAKE URLs were http://elvapovep.blogspot.com, http://traceygisyrif.blogspot.com, http://yeseniamaten.blogspot.com, http://isabelfaremad.blogspot.com, http://merletozywy.blogspot.com http://glendarodyz.blogspot.com, http://gabriellenugyhy.blogspot.com, http://darlenebepip.blogspot.com. What this hacker does is he first tries to get your username and password by providing you a FAKE Facebook login page (which is http://faceilbook.com/) and if you provide your login details there, he’ll try to hack all the friends in your friends list by sending them Wall posts, as you sending them. Therefore be vigilant whenever you type your username and password when you login to Facebook or any other account you have (E-mail, Hi5, MySpace etc). Spend few seconds to make sure that the URL appearing on the address bar is not a phishing Web site, which is looking to steal your username and password. Say NO to PHISHING.

Bookmark and Share


I use Pidgin in my personal computer to chat with my buddies. It is a great tool (Chat Client) where you can log in to all you chat accounts using a single interface. Currently it supports most of the very famous messenger channels like Gtalk, Yahoo, MSN, MySpace etc. But something I found a bit difficult is how pidgin notifies me when a buddy logs in/out. By default it makes a beep sound (Which you can configure to a sound source you prefer) when a buddy logs in/out and doesn't show the alias of the buddy who logged in or logged out. This was a bit uncomfortable for me to handle because to know who logged in/out, every time I had to open pidgin and look at the buddy list whenever I heard a beep sound. Finally I found an additional plugin after writing this to pidgin community in Ubuntu forum. The plugin is called libnotify-popup and comes with pidgin-libnotify package which allows pop-ups to appear on the bottom -right of the screen when a buddy logged in/out. Here goes the steps to install and configure the plugin.
  1. First open a treminal by pressing Alt + F2 or by going to Applications > Accessories > Terminal.
  2. Type "sudo apt-get install pidgin-libnotify" to install pidgin-libnotify package.
  3. After the installation, restart pidgin.
  4. Now go to Tools > Plugins in Pidgin Chat Client and select libnotify-popup plugin from the list.
  5. Now click Configure Plugin button at the bottom of the window and configure it to receive popup notifications when a buddy logs in/out by selecting the apprropriate check boxes.
Bookmark and Share


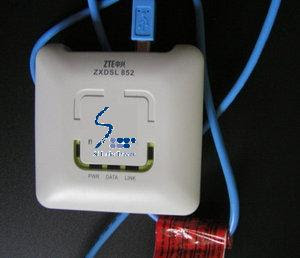
I bought an ADSL Broadband Home Express package from SLT few days back for my personal use and I wanted it to be installed on Ubuntu Linux. At the time of purchasing, I forgot to specifically mention that I'm planning to use it on Ubuntu. After having a nice chat with the demonstrator provided to me to clarify the matters I had on choosing the right modem that suits me from a range of products, I chose to go with a ZTE ZXDSL 852 modem. After coming home and failing to find the drivers for Ubuntu Linux on the driver CD came with ZTE ZXDSL 852, I was able to contact a technical assistant from SLT over the phone to ask that "dumb question" I forgot to ask at the purchasing time, "Does this run on Ubuntu Linux?". I got the answer that suprized me the most when she replied me back with "Sorry Sir, Currently we don't support any Linux variants", with her sweet voice. But It was not the end of my dream of a high speed Internet connection, thanks to Adrian Lubic, who is the founder of UbuDSL driver for ZTE ZXDSL 852 on Ubuntu. I know some of my friends who bought ADSL connections from SLT with 4-port routers to be used with Linux variants, just because they knew the fact that SLT doesn't provide drivers for ZTE modems, but you don't need to spend additional bucks on routers as UbuDSL does exactly what you were looking for (i.e. Provides an Interface to use ZTE ZXDSL 852 modems with Ubuntu Linux).

Installing UbuDSL is pretty simple. First you have to download the latest stable version of UbuDSL from SourceForge. You need to unpack the deb package and it will install UbuDSL to your Ubuntu box. Then you need to follow the following steps to configure your ZTE ZXDSL 852 modem with UbuDSL.
  1. Go to System > Administration and Open the UbuDSL Configuration panel
  2. Then simply follow the instruction appears on your screen. For your simplicity, it is described below.
  3. First, you need to unplug your ADSL modem, if it is already connected. Then click the next button at the bottom of the configuration window.
  4. Then a second configuration screen will appear where you need to insert the username and password provided by your service provider (i.e. SLT). Then select Sri Lanka from the country drop down box which will automatically sets the service drop down box to SLT. Set the combo boxes given according to your preferences. I chose "OpenDNS" and "Strat Connection while user plugs the modem" check boxes.
  5. In the next screen, you will be asked to plug your modem and after that, install your Ubuntu CD to install the additional packages it needs. If the configuration window takes a lot of time to goes to the next step after you inserting the Ubuntu CD, you might have to manually install the required packages from the Ubuntu CD. This happens due to absence of additional packages that UbuDSL is looking for at the configuration time. If it is the problem with you, its worth checking this link out because it carries all the information that is required for a newbie like me to install the additional packages manually. After installing the additional packages manually, you need to again start from the step 1 to configure your modem. Others can proceed to fourth configuration screen where it asks you to reboot your system.
  6. Now reboot the system and try to connect to the Internet using UbuDSL Applet. You can find it in Application > Internet. Hurrah... You just configured your ADSL connection correctly. Now enjoy surfing!!! ;-)
  7. If you still have connection problems, please make sure that the /etc/modprobe.d/options file is configured correctly. You can open that file using the command "gksudo gedit /etc/modprobe.d/options". Locate the line starts with "options unicorn_usb_eth" and make sure it has something similar to "PROTOCOL=pppoe ENCAPS=lllc-encaps". Now you can reboot the system and start surfing!!! :-D
Bookmark and Share


This article carries out some facts on how to disable AutoRun feature available in Microsoft Windows Vista. It is based on some facts I got by googling "How to disable AutoRun in Vista". Usually, we can stop a removable device executing its autorun.inf file by holding the SHIFT key while plugging it to the computer in Windows XP versions. But this is no longer supported in Windows Vista and therefore I suggest the following method which will stop the execution of the autorun.inf file/s saved in your removable media, (i.e. Pen Drives, CDROMs etc.). Note that this will not stop the pop up window appeas as soon as you plugged a removable media. If you want to stop popping up that window, use "Set AutoPlay Defaults in Control Panel" link appears at the bottom of the pop up window and unckeck "Use AutoPlay for all media types box".

You need to write a small registry entry and add it to your registry to permanently block the execution of autorun.inf files. The code you need to write is given at the end of this post. These three lines should be saved in to a new file called NoAutoRun.reg. Then right click on it and merge it in to your system's registry. You need to restart your computer after merging new values to the system registry and then you can check whether its working by inserting a CD which has an autorun.inf file (Most of the software CDs have autorun.inf files) and it will not run automatically unless you manually run it. Good Bye AutoRuns :-D

REGEDIT4
[HKEY_LOCAL_MACHINE\SOFTWARE\Microsoft\WindowsNT\CurrentVersion\IniFileMapping\Autorun.inf]
@=”@SYS:DoesNotExist”

Bookmark and Share